

Removing limescale spots from car windows without scratching the glass
Daniel von Detailing1 |


Koch-Chemie × COLOURLOCK
COLOURLOCK "Crosslinker CD" Hardener
Stronger color film and professional finish for maximum durability
Koch-Chemie × COLOURLOCK
Protective gel for seam coverage during dyeing
Koch-Chemie × COLOURLOCK
COLOURLOCK "Soft Slip" Top Coat additive for a velvety surface
Improve haptics for a velvety-soft leather surface
Koch-Chemie × COLOURLOCK
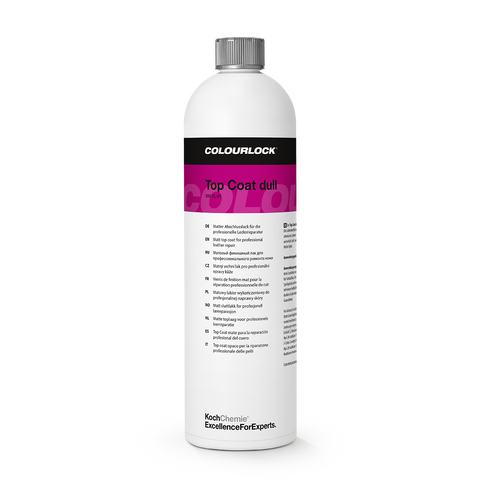
COLOURLOCK "Duller" matting additive for professional use
Matting additive for naturally matte repair results
Koch-Chemie × COLOURLOCK
COLOURLOCK "Thickener" additive for thickening coloured filler
Thickening Additive for Precise Filler Repairs
Koch-Chemie × COLOURLOCK
COLOURLOCK "Wax Slip" Top Coat additive for waxy surfaces
Additive for waxy, grippy leather surfaces
What are COLOURLOCK's additives and aids? Additives you stir into leather dye, tinted filler or Top Coat to set gloss level, feel, abrasion resistance and body independently of each other, plus a protective gel that masks contrast stitching while you dye. None of these additives goes onto the leather neat.
Additives & aids by COLOURLOCK are the fine-tuning tools of the dyeing line from the leather specialist that has supplied repair businesses as Lederzentrum since 1995 and is now part of Koch-Chemie. They never go straight onto the surface; they always go into the cup first: into the leather dye, the tinted filler or the Top Coat. There they control gloss level, feel, hardness and viscosity independently. The dye gives you coverage; the additives decide whether the area matches the rest of the interior.
Detailing1's tip from the shop: Always mix up every additive blend on a test piece first, not on the seat. A palm-sized leather offcut or the hidden underside of a seat bolster will do: apply the mix, let it dry right through, then hold it up against the neighbouring area in daylight. Gloss judged wet is deceptive — a matting level that looks spot-on in the wet film routinely dries down too flat. Almost every enquiry we get about visible touch-ups comes down to exactly this: the shade was right, the gloss was judged on the wet coat and ended up one notch off. Two minutes on a test piece saves you rebuilding an entire panel.
The additives are the only group in the dyeing line that never ends up on the leather. They go into the cup beforehand, and how much you add decides the result across the whole area.
There's a practical reason for that. After dyeing, three properties are still open that no dye brings with it: how much the area shines, how it feels and how much friction it can take. On top of that come two purely hands-on problems — runny filler sags on vertical seat bolsters, and light contrast stitching picks up colour when you spray. For each of these jobs there's exactly one additive.
This split comes from the repair trade, not from marketing. A touch-up is never judged against a colour chart but against the area right next to it — and that has a specific gloss level, a specific feel and a factory hardness your fresh build-up has to hit. COLOURLOCK was born in 1995 at Lederzentrum, where exactly that comparison happens every day, and that's why it gives you dials rather than ready-made recipes.
Day-to-day at Detailing1, we see when customers land on this shelf: almost never at the start of a project, but after the first pass. Dye and Top Coat are on, the work is clean, and it still screams "repair" — because it's shinier, feels slicker or squeaks when you slide across it. Those are three different problems with three different additives, and none of them is solved by more dye.
The line breaks the finish down into properties you can adjust one by one, instead of bundling them into a single all-in-one bottle. If you know which question is still open, you find the additive in one step.
The Matting additive by COLOURLOCK, COLOURLOCK "Duller", controls the look. It puts ultra-fine matting particles into the drying film that scatter incoming light in many directions instead of bouncing it straight back like a smooth painted surface. How you notice: the freshly dyed seat no longer throws back a reflection of the window and blends in next to the factory leather instead of lighting up from every angle. Available as 250 ml and as 1000 ml / 1 litre.
The Soft & Wax Slip handle additives by COLOURLOCK control the feel. COLOURLOCK "Soft Slip" lowers the friction of the finished top layer; COLOURLOCK "Wax Slip" embeds fine wax particles in the surface and so changes its microstructure. In practice: your hand glides over the steering wheel rim instead of sticking to it, and the seat feels like leather rather than a coat of paint. Both come as 250 ml.
The Crosslinker by COLOURLOCK, COLOURLOCK "Crosslinker CD", controls durability. It ties the binder chains in the freshly mixed Top Coat together crosswise, turning a film that simply dries into a chemically closed network. In everyday use: the area stands up to sweaty hands, sun cream and interior cleaner instead of softening at the first damp wipe. The 50 ml bottle goes a long way, because one to two per cent in the Top Coat is enough.
The Thickener by COLOURLOCK, COLOURLOCK "Thickener", controls workability. It changes the flow of tinted filler without touching shade, adhesion or flexibility — a runny paste becomes one that stays put. In plain terms: you can model a deep groove on the vertical side bolster without the filler slumping while it dries. Pack size: 100 ml.
The Seam protection gel by COLOURLOCK, COLOURLOCK "Stitch Covering Gel", is the only product in the group you don't stir in. It sits over the thread as a temporary, flexible barrier and blocks even fine overspray. Once the dye has dried through, you rub it off or lift it with a damp cloth, and because it contains no curing components, the stitching stays soft afterwards. The 20 ml tube covers many metres of seam.
COLOURLOCK "Soft Slip" and COLOURLOCK "Wax Slip" look almost identical on the data sheet and produce two clearly different surfaces. The difference is whether your hand should glide or grip.
COLOURLOCK "Soft Slip" works via the surface energy of the top layer and lowers friction — the result is velvety and lets your hand slide off without resistance. That suits seat bases, armrests and furniture edges, i.e. anywhere clothing moves across the surface. COLOURLOCK "Wax Slip" goes the other way: the embedded wax particles make the surface rich and slightly grippy, just like modern automotive leather straight from the factory.
On the steering wheel rim, this difference isn't a matter of taste. A rim that's too slick feels unsafe with damp hands; one that's too grippy sticks very slightly to your palm and lets go with a jerk — that's where the squeak when manoeuvring comes from. Here, Wax Slip hits the factory feel far more often than Soft Slip. You can also combine both, which gives you a velvety surface with a waxy character underneath.
One rule makes choosing easier: matting, feel and crosslinking don't get in each other's way. You can put COLOURLOCK "Duller" for the look, COLOURLOCK "Wax Slip" for the feel and COLOURLOCK "Crosslinker CD" for resistance into the same Top Coat mix. So gloss level is no longer a question of which product you buy: instead of choosing between matte and gloss Top Coat & finish by COLOURLOCK, you blend both in proportion and fine-tune the rest with the matting additive.
When people ask us about this difference, it's almost always the same situation: the touched-up seat bolster looks the right colour but feels wrong when you get in. In the vast majority of these cases, the surface came out too slick — a Top Coat without a handle additive dries as a closed skin of lacquer, and next to the aged leather beside it, that feels like plastic film.
The dyeing line follows a fixed sequence: degrease, prime, fill, dye, seal with Top Coat, dial in the finish with additives. Each additive has its set place in that sequence.
Right at the front comes the seam protection gel, before the first coat of colour. After Degreaser by COLOURLOCK and sanding, you put a thin layer on the contrast stitching and leave it there until after the last colour coat. The thickener follows in the filling step and goes straight into the tinted filler from Filling colour by COLOURLOCK until the paste holds its shape. Matting additive, handle additives and crosslinker go into the Top Coat last.
When stirring them in, stick to a fixed order. Set gloss and feel first, stir thoroughly and judge — only then add the crosslinker fresh. The reason is pot life: once the crosslinker is in, the reaction is running and the mix has to be used promptly. So only mix as much as you'll spray in the next hour, and mix the rest fresh.
Two details get overlooked again and again. First, the matting additive is a solid and settles at the bottom of a standing bottle — if you don't stir it thoroughly before every pour, you under-dose in the first cup and over-dose in the last. Second, dry to the touch isn't chemically done: the area feels dry after minutes, but it's only fully crosslinked after 24 to 48 hours.
We've all underestimated settling at some point. We regularly see cases where the driver's and passenger's seats end up with two visibly different gloss levels after the same working day — mixed from the same bottle, just from the top third and the bottom third. So: stir before every new cup, not just at the start. For a full set of seats, better allow two days on your first project; from the second time on, a weekend will do.
No additive in this group fixes a mistake made earlier in the process. Where adhesion is missing, even the crosslinker won't help.
The clearest limit is degreasing. Silicone-based interior dressings, hand cream and sun cream leave a film that neither primer nor dye will hold on. A crosslinked Top Coat on an uncleaned base doesn't become more durable; it just flakes off as a harder piece. Nor does an additive replace the shade: gloss, feel and hardness can be adjusted, but the exact tone comes from mixing the Leather dyes by COLOURLOCK.
Over-dosing is the second limit, and we've managed it ourselves. Trying to match the very matte factory leather of an older interior exactly, we pushed the matting additive well beyond the recommended range. The gloss level was right afterwards, but the surface felt chalky and visibly wore at the first clean. The binder can only carry a limited amount of solids; beyond that, the film turns brittle. Since then we go up in one-per-cent steps and would rather accept a touch too much gloss.
Two further limits are hard ones. None of the additives is applied neat, because none of them forms a load-bearing film on its own. And the group has no business on open-pored aniline and nubuck leather: there's no top-coat system there for an additive to work in.
The third limit isn't about material but about safety. The outer bolsters of many seat backs contain the tear seam for the side airbag, a designed breaking point subject to documentation that must neither be painted over nor stiffened by crosslinked layers. The fact that the protective gel masks stitching cleanly changes nothing about that. Work on or right next to this seam belongs with a specialist upholsterer with proof of competence.
Your way into this group follows from whatever bothers you about the finished area. Each of the typical faults has exactly one starting point.
If the touched-up area is shinier than the leather next to it, Matting additive by COLOURLOCK is your product — by far the most common reason a clean dye job still stands out. If the area feels wrong, slick like film or squeaky when you slide, reach for the Soft & Wax Slip handle additives by COLOURLOCK: Soft Slip for a velvety glide, Wax Slip for the waxy, grippy factory feel.
If the fresh colour rubs off on a jeans seam or belt buckle, or transfers onto light clothing, it's missing crosslinking — then one to two per cent from the Crosslinker by COLOURLOCK shelf goes into the Top Coat. If thin filler runs down vertical bolsters, Thickener by COLOURLOCK sorts it. And if you've got light contrast stitching on dark leather, mask it with Seam protection gel by COLOURLOCK before the first coat of colour instead of painstakingly freeing it up afterwards.
If you're planning the whole job from scratch, you'll find the full build-up one level up: Back to Dyeing & finishing by COLOURLOCK. There, the additives are the last step and also the only one that takes its cue from the neighbouring area rather than from a data sheet value.
And the point that explains the whole group: most visible touch-ups don't fail on shade; they fail on gloss. The eye only spots a colour difference from half a metre away, but it sees a gloss edge from across the cabin, because light breaks on it differently. If you only take one additive from this shelf, take the matting additive.
Too much choice in Additives & aids by COLOURLOCK? Get help picking:
Daniel von Detailing1 |

Daniel von Detailing1 |

Daniel von Detailing1 |

Daniel von Detailing1 |

Jasper von Detailing1 |

Daniel von Detailing1 |

Daniel von Detailing1 |

Daniel von Detailing1 |

Jasper von Detailing1 |

Jasper von Detailing1 |

Daniel von Detailing1 |

Daniel von Detailing1 |